Put Bookmarks to Work in Your ArcGIS Pro Projects
You likely have a browser full of bookmarked web pages, making the information you most often need to retrieve right at your fingertips.
Bookmarks can be just as helpful when used in ArcGIS Pro. There are some cool tools in ArcGIS Pro that will give you the ability to convert bookmarks to animations and create bookmarks at certain points in time.
Bookmarks will save you precious time when you are working on a project. You can create spatial bookmarks at locations on a map and go back to them at any time. For example, if you have a large map and several small study areas on the map, you can save time panning and zooming to those areas by creating a bookmark at each location. Or if you are giving a presentation with ArcGIS Pro (like a demo), bookmarks come in very handy for saving your place and transitioning smoothly between places on the map.
The bookmark captures and saves your current view extent. When you create a bookmark in ArcGIS Pro, it is added to a list, given a unique thumbnail and name, and saved with the 2D map or 3D scene you captured it in. A project contains a list of all the bookmarks saved with all open maps in that project.
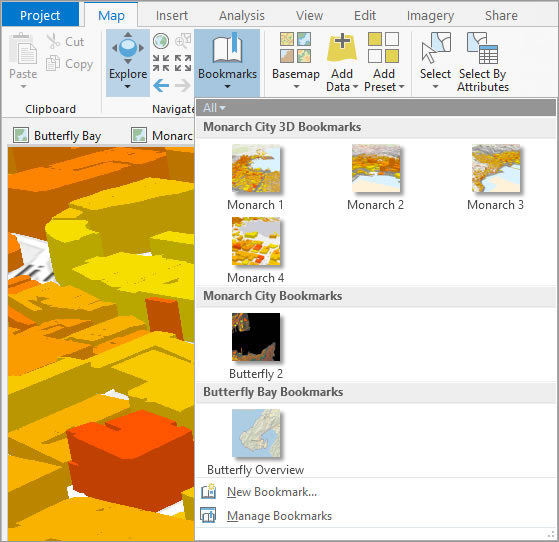
Use bookmarks to save your favorite or frequently used map extents. They're stored with a title and thumbnail on the Bookmarks drop-down menu.
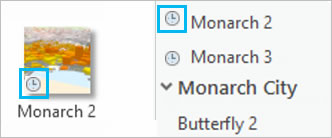
In ArcGIS Pro, bookmarks can also be temporal. If you have time-enabled data, you can create bookmarks at specific points in time. For example, if you have data that tracks the migration of monarch butterflies across North America, you can create a bookmark showing the butterflies' location midmigration and return to it anytime. Temporal bookmarks display with a clock icon that appears both in the thumbnail and next to the bookmark name in a list view.
Create and use bookmarks
Step 1. Pan or zoom to the location or time that you want to bookmark.
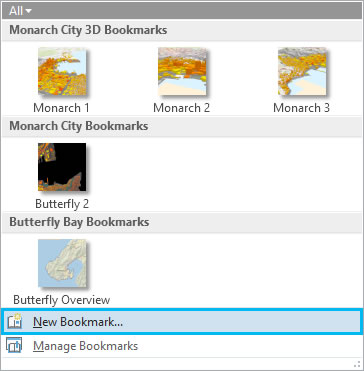
Step 2. On the Map tab, click the Bookmarks drop-down menu, and click New Bookmark.
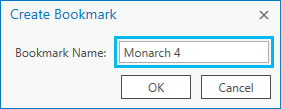
Step 3. Type a name for your bookmark, then click OK.
Step 4. Click the Bookmarks button to see your new bookmark and other bookmarks you've created in that map or other open maps in the project.
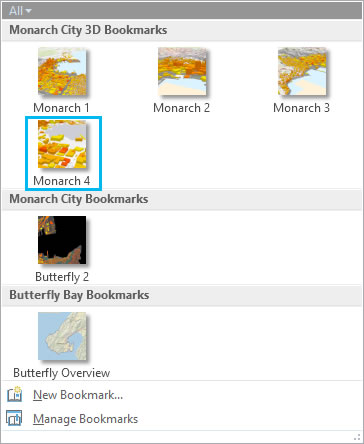
Step 5. Click any of the thumbnails on the Bookmarks menu to go to that location.
Use the Bookmark Manager
If you want to modify your bookmarks, open the Bookmarks pane. On the Map tab, click the Bookmarks drop-down menu and click Manage Bookmarks.
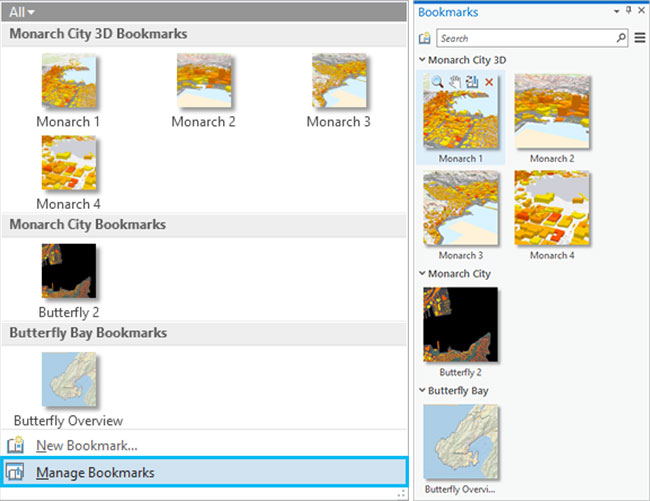
In the Bookmarks pane, you can do any of the following:
- Reorganize your bookmarks list
- Update the location of a bookmark by clicking the Update button
- Create new bookmarks
- Rename or delete bookmarks
Create an animation with bookmarks
Animations are a great way to tell the story of your 2D and 3D maps. Check out this awesome video of animations to quickly see how powerful they can be in displaying and conveying information.
You can use your bookmarks to create an animation.
- On the ribbon, click the View tab and click Add to access the Animation tab.
- In the Create group, click Import and choose Bookmarks to Fly-Through or Bookmarks to Tour.
Watch this short video on how to convert bookmarks to animation.

No hay comentarios:
Publicar un comentario